Who Where When K-2
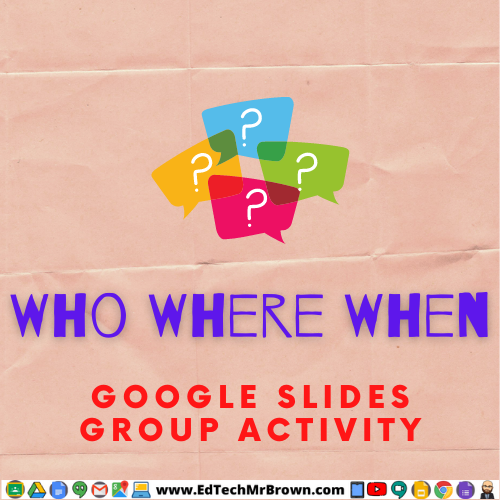
Students must determine if each statement represents a who, where, or when. This is a whole group teacher led activity.
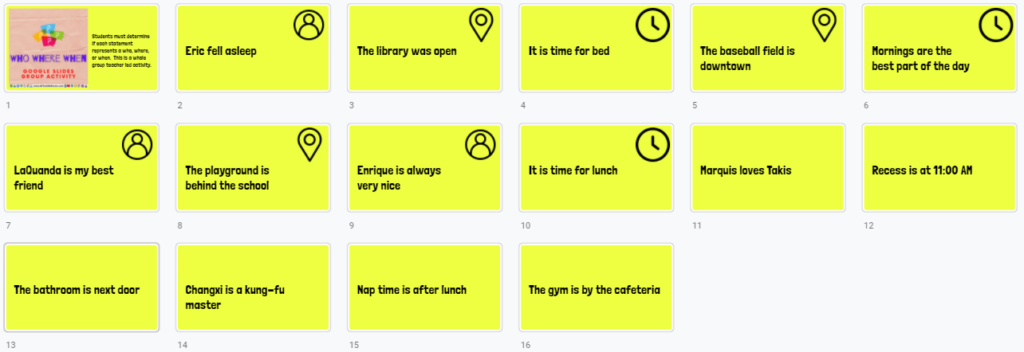
Students must determine if each statement represents a who, where, or when. This is a whole group teacher led activity.
Super quick and easy, How to convert a PowerPoint to a Google Slides Presentation. Do heed that warning you get about some features not transferring over. That will definitely happen. Also remember that this Google Slide will be a totally new and separate file.
Here are a few different resources on how to make animated gifs. Gifs are like short video clips with no sound. Gifs can be very powerful teaching tools. Gifs are more exciting and more informative than an image. You or your students might make gifs to explain a concept, demonstrate a vocabulary terms meaning, explain mood or tone in a passage, predict or even show their own scientific experiments results, reenact historical events, showing steps to a math problem, etc.. Perhaps you have searched for a gif before but couldn’t find exactly what you needed. Now you can make your own. Jump in and get your students making gifs, they will enjoy it as it is a relevant and engaging activity for them. Please send me your gifs and the cool ideas you had for getting students busy making gifs.
Here is a simple young student friendly gif maker from abcya.com
https://www.abcya.com/games/animate
Gifcap captures your screen to create a gif
Unscreen.com let’s you remove the background from a video and turn it into a gif.
Capture to a Gif is a chrome browser extension that can pull a gif right from your screen in a screen clipping fashion capturing only the are you want. I can see this being an incredibly valuable tool.
https://chrome.google.com/webstore/detail/capture-to-a-gif/eapecadlmfblmnfnojebefkbginhggeh?hl=en
Expert Groups
Divide all of your students up equally into Expert Groups.
Assign a different topic from the unit to each expert group.
Expert Groups must collaborate online to create one digital graphic organizer that thoroughly and accurately explains their topic.
You might want to include specific requirements to lead your experts in the right direction.
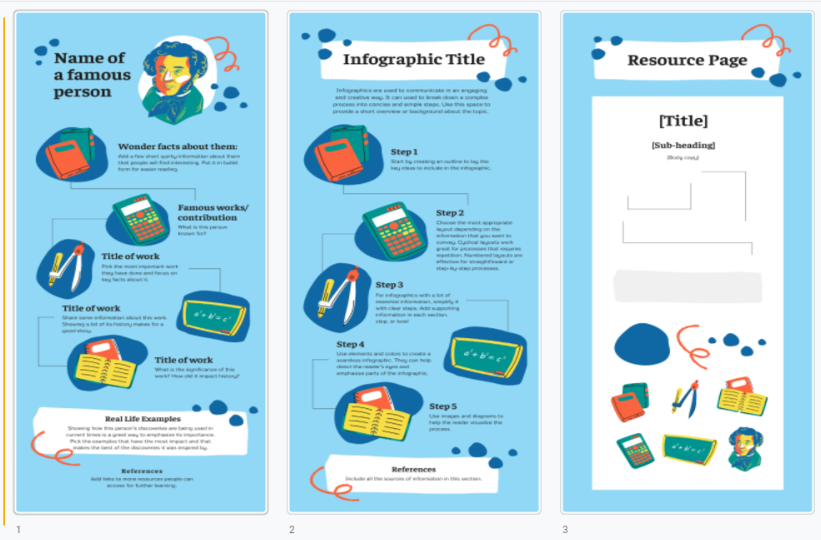
Expert Groups need to choose an infographic template from the list here at Canva.com
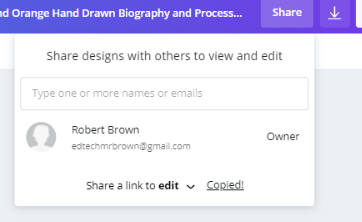
They can share and collaborate on the same infographic by clicking share and then share a link to edit.
Teaching Teams
Teaching teams should be made up of evenly distributed students, one from each expert group.
Each teaching team needs to create a copy of this collaborative Google Slides Presentation and share it with everyone in their teaching team. Each expert needs to upload their infographic to the Google Slides Presentation.
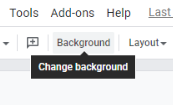
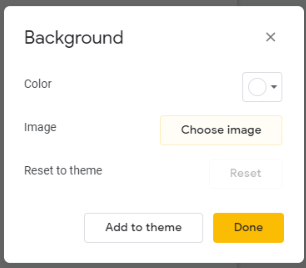
Experts should download their groups infographic as a PNG image file. They then need to upload that image file to the background image of their slide in the collaborative Google Slides Presentation (directions follow below).
Teaching Teams should then take turns teaching each topic to their team using the infographic as a guide to their teaching.
https://jamboard.google.com/d/1oCABwLAF9Oe1R-gR4KOeVAdq9OcR7G6GeDePagLq50g/edit?usp=sharing
Have your students debate and determine where on the map each post it note should go.


OpenShot is a free video editing software that you can download and use for all of your video editing projects. You can use it to create full length video productions or for tasks as simple as trimming a video you previously recorded. Today we are going to take a look at how to use OpenShot to trim a video we recorded in Google Meet.
Join us for Episode 9 of the EdTech Update as we talk to Mr. Gunnels about this new year, we see the Fast4Friday from Harper Elementary School, we will hear from Mr. Vincent about the 1 to 1 roll out, we will see a cool little tool called Blabberize in action, and we’ll give away some Education Galaxy prizes! Also there is a give way contest at the end. BE THE WINNER!
Please join myself and our own expert, Lara from ClassCraft.com, live in Google Meet during your lunch time Wednesday 22 September. Lara will give you a quick introduction to Class Craft and answer any questions you might have.
Class Craft is a really cool gamified positive reinforcement focused classroom management tool. Classcraft also offers really cool customizable adventure quest lesson templates for you to create exciting supplemental learning opportunities. With your students now having full time Chromebook access, this is the time to jump into this amazing tool.
https://meet.google.com/ziq-cbxe-dhy <— 22 September during your lunch go there.
Super cool 8 second teaser trailer
Please see the links below for brief precursory overview.
It was a pleasure learning more about your district. I have a few documents below for you to review; please let me know if you have any questions or if there is any other information I can provide.
Looking forward to our Lunch and Learn next week! Have a great day!
Sincerely,

Lara CrutcherSolutions Advisor at Classcraft

Teachers and students will both access the online textbooks for HMH through ClassLink. It is the Holt McDougal My HRW app at this time (I have seen that change so look for something HMH related). Inside this app you can choose what ever text book you need access to.
That will drop you on your Dashboard which gives you access to the many available resources.
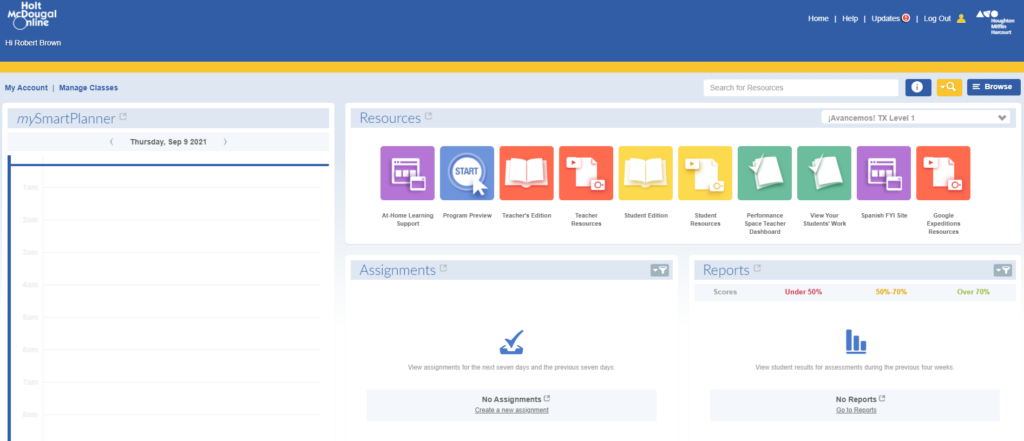
At-Home Learning Support gives access to .pdf copies of the text book’s student edition.
The Program Preview is a short video about the resources available to teachers and students
Teachers Edition opens a browser based online copy of the textbooks teacher edition. There is a print option available from the menu on the left side of the page as well as other helpful tools like the ability to create bookmarks and notes.
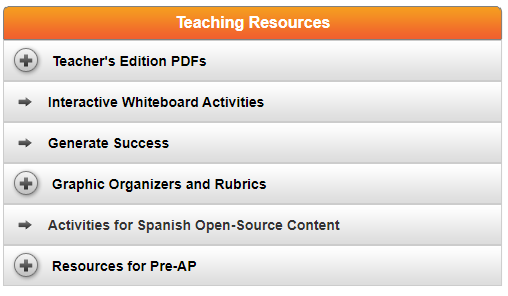
The Teacher Resources menu provides access to tons of resources but most importantly I found Graphic organizers and Rubrics. Also, Activities opened up an enormous Word doc that included printable worksheets and activities.
Student Edition opens up a browser based online version of the textbook with many tools including access to additional resources with practice activities.
Student Resources gives students access to practice activities, self check quizzes, and review games.
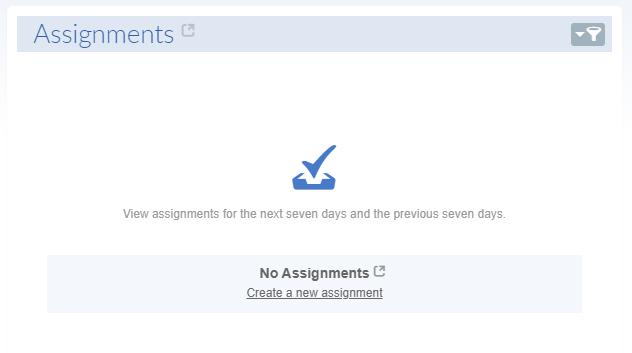
Assignments gives you the ability to assign online digital activities to your students.
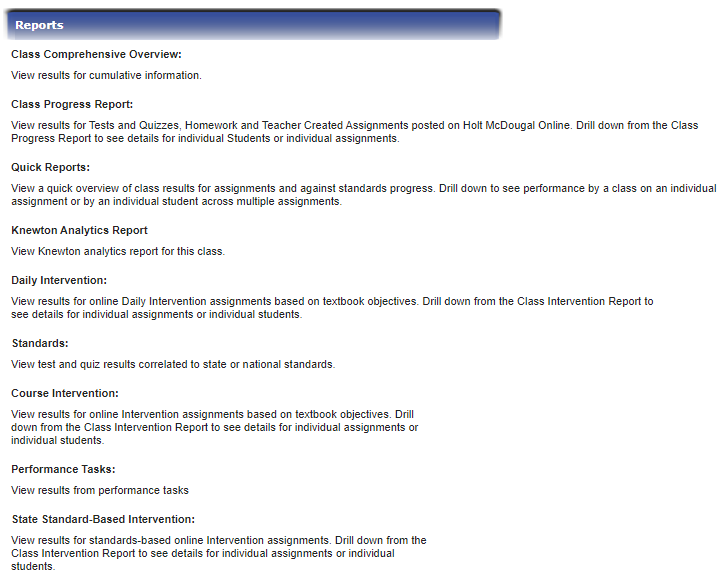
Reports gives you access to ALL THE DATA!!!
Access Strive through Eduphoria, which is in Classlink.
Click on My Evaluation Process from the menu on the left.

Find the Uploaded Evidence box under the Evaluation Process tab
Click the arrow to expand the box
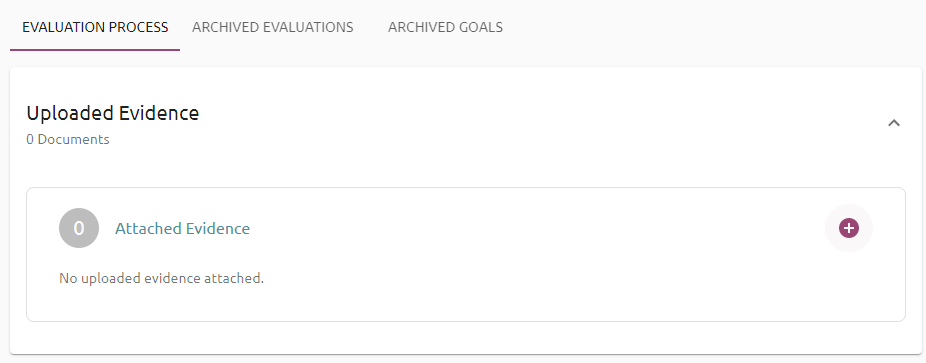
Click the Plus sign to add evidence
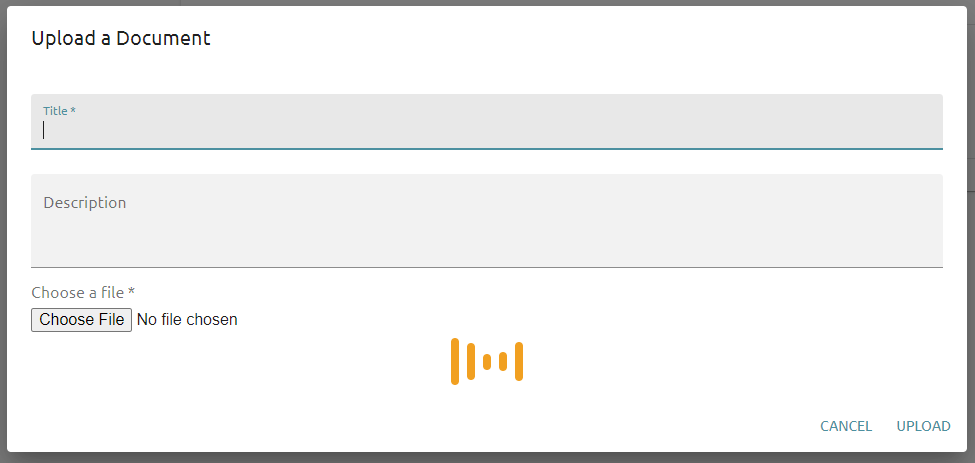
Give your evidence an appropriate Title that clearly identifies what the evidence is
Give your evidence an accurate description to help your evaluator
Click the Choose File button to locate the evidence you would like to submit
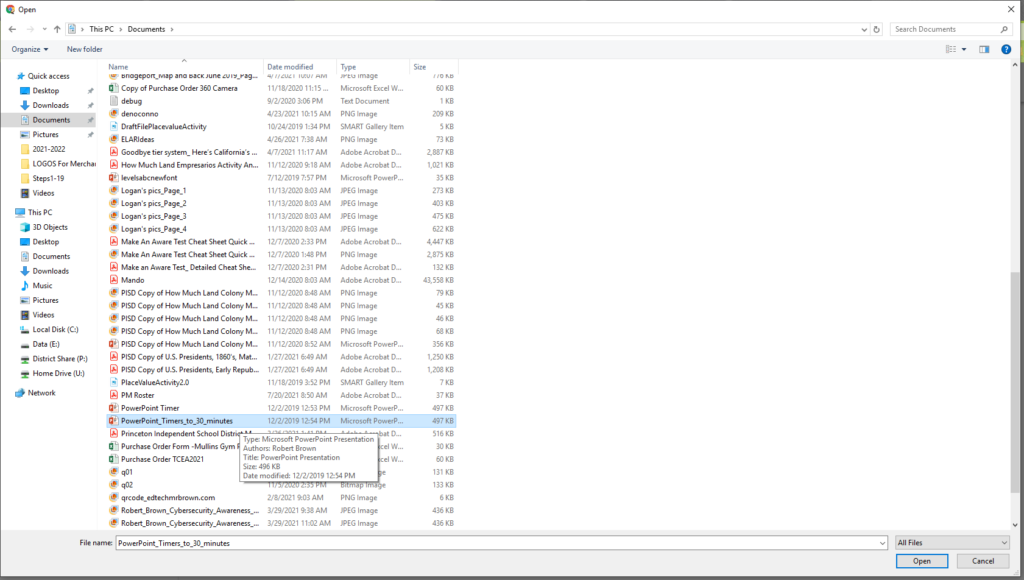
Use the file explorer to select the evidence you wish to upload
Click Open to choose that file
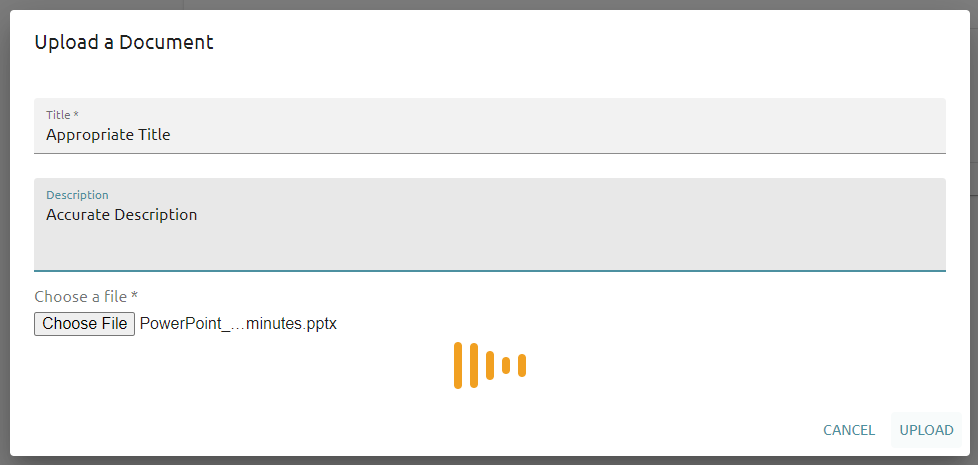
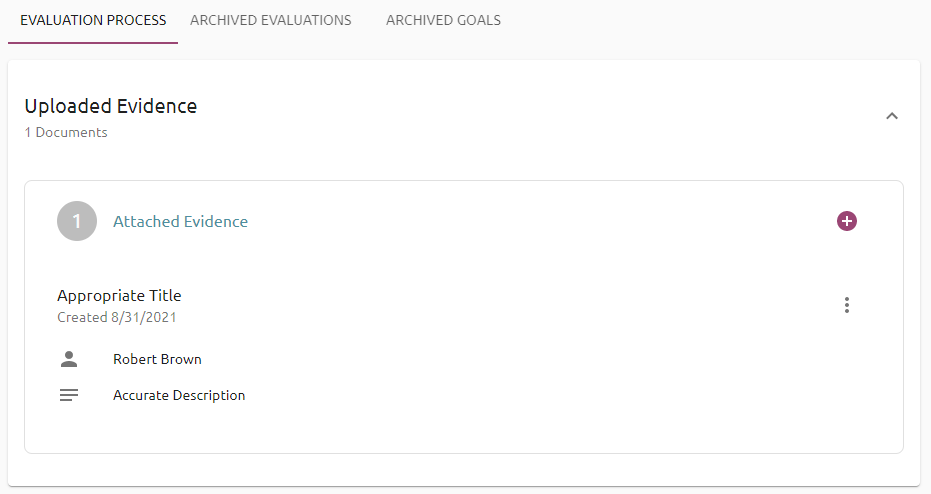
Lastly click Upload to complete the process
Then your screen should then look like this:
https://kb.infinitecampus.com/help/send-general-class-messages-to-students-and-parents

These directions are for making and using an ad-hoc filter to message parents.
Two parts
Edit the Filter
Send the message
Part 1
Step 1 Log in to infinite campus from ClassLink
Step 2 Open Ad Hoc Reporting menu
Step 3 Click on Filter designer
Step 4 Click + to expand the user group for your campus
Step 5 Scroll down to find The template you want to use
Step 6 Ensure that active year is selected
Step 7 Click Edit
Step 8 Click Next
Step 9 Enter the Course number and section number for each class the student is registered in
Step 10 Complete any remaining Course and section number boxes by repeating the last one you entered
Step 11 Click Save
Part 2
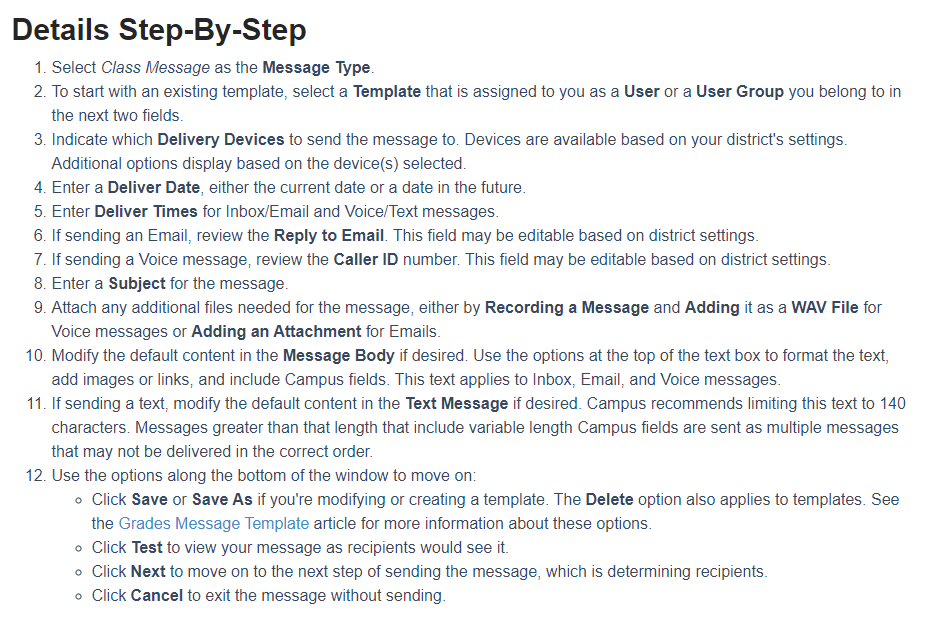
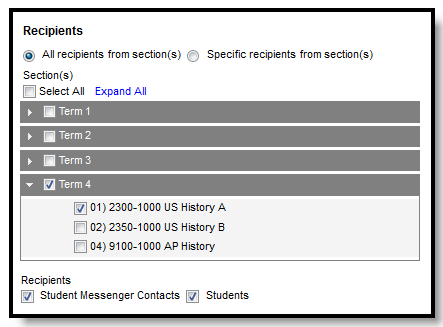
Step 12 Open Messenger menu
Step 13 Click on Message Builder
Step 14 Choose your campus from the User /Group drop down box
Step 15 Choose your letter the Template drop down box
Step 16 Click + to expand the user group for your campus
Step 17 Scroll down to find and click on your class
Step 18 Click Preview/Send
Step 19 Click Send Message

This PowerPoint presentation has a fifteen minute station timer and a two minute cleanup and transition timer. Once you launch the slide show it does all of the work for you. The timers start automatically and the slides are timed to automatically transition without any effort on your part. They include music to help indicate what is happening. It is a PowerPoint file and not a Google Slides. It will not work in Google Slides. It is a large file and might take a while to download. Copy paste the slides for each station you have or set the Slide Show to start again when completed.
https://drive.google.com/file/d/15hdcs_xhl4HU7ARwNDuv5X0cQfTLc6Ox/view?usp=sharing
Teachers!!!
The Chromebooks are coming!!
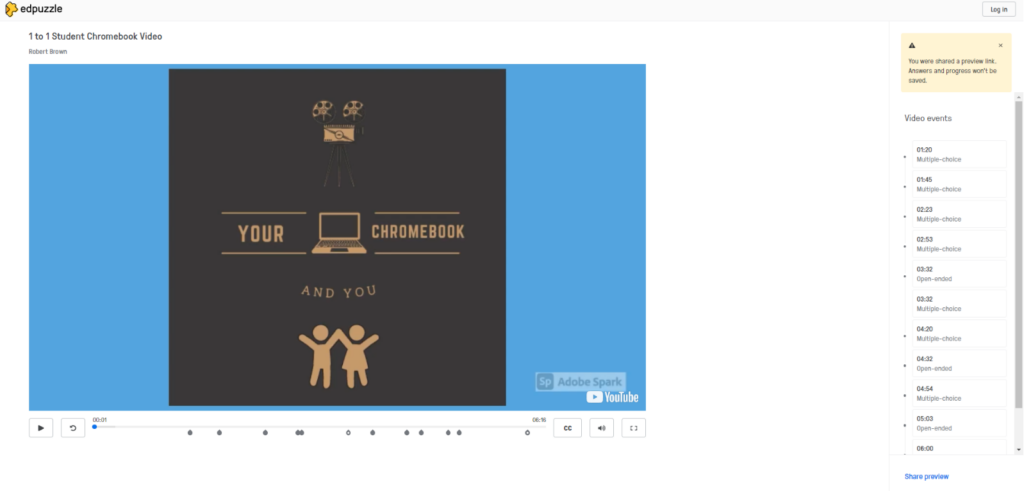
I have created a video to explain the new Chromebooks to the students.
The video is on YouTube so that you can play it for your class. You should probably develop a plan to show it on your campus so students don’t have to sit through it six times a day.
I then followed the sage advice of Mrs. Nelson and turned the YoutTube video into an EdPuzzle Activity. Now you can assign it in Google Classroom as an activity for your students. It includes many multiple choice questions that will grade automatically and provide you with an assignment grade for your gradebook.
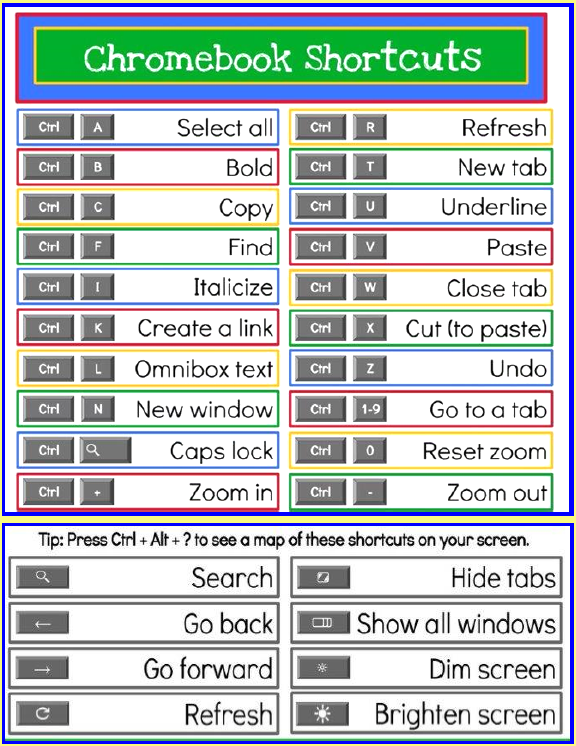
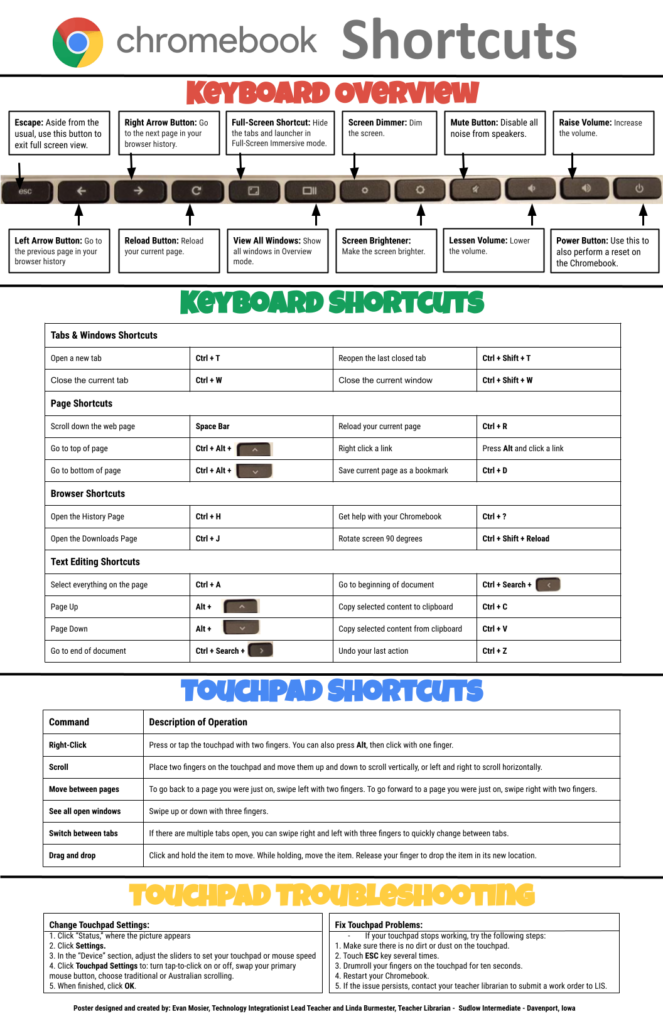
I have also created this poster/cheat sheet that you can print to hang in your classroom.
January 14, 2020|Alwayslearning, EdTech, Elementary, Google, Secondary, Tools
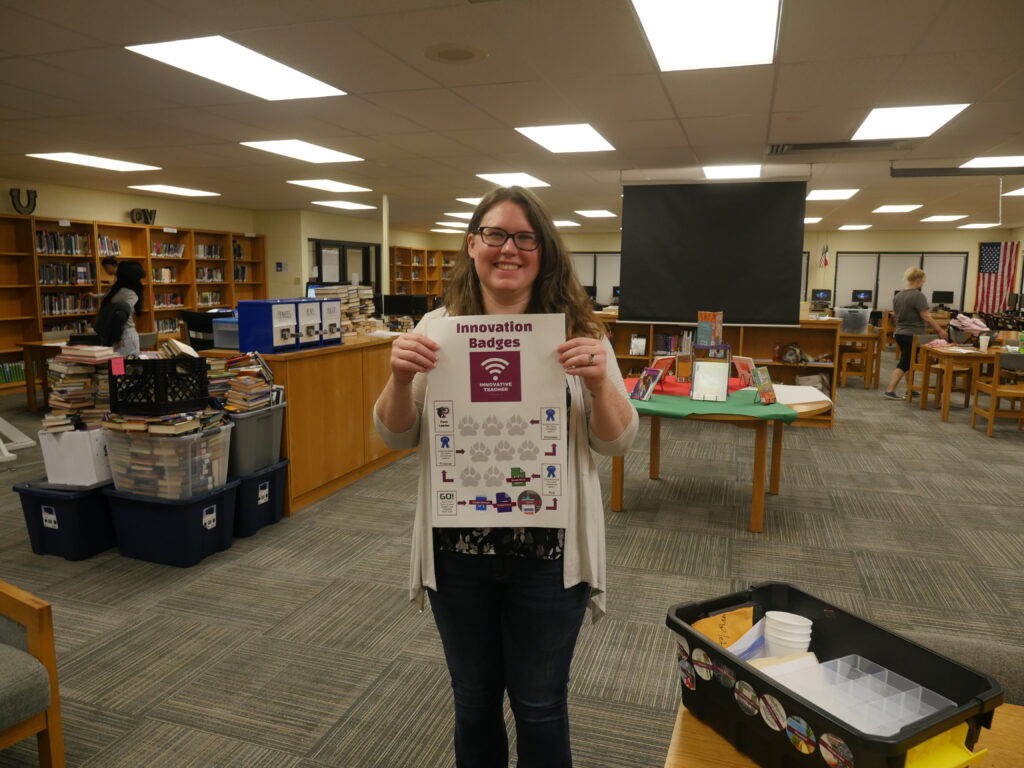
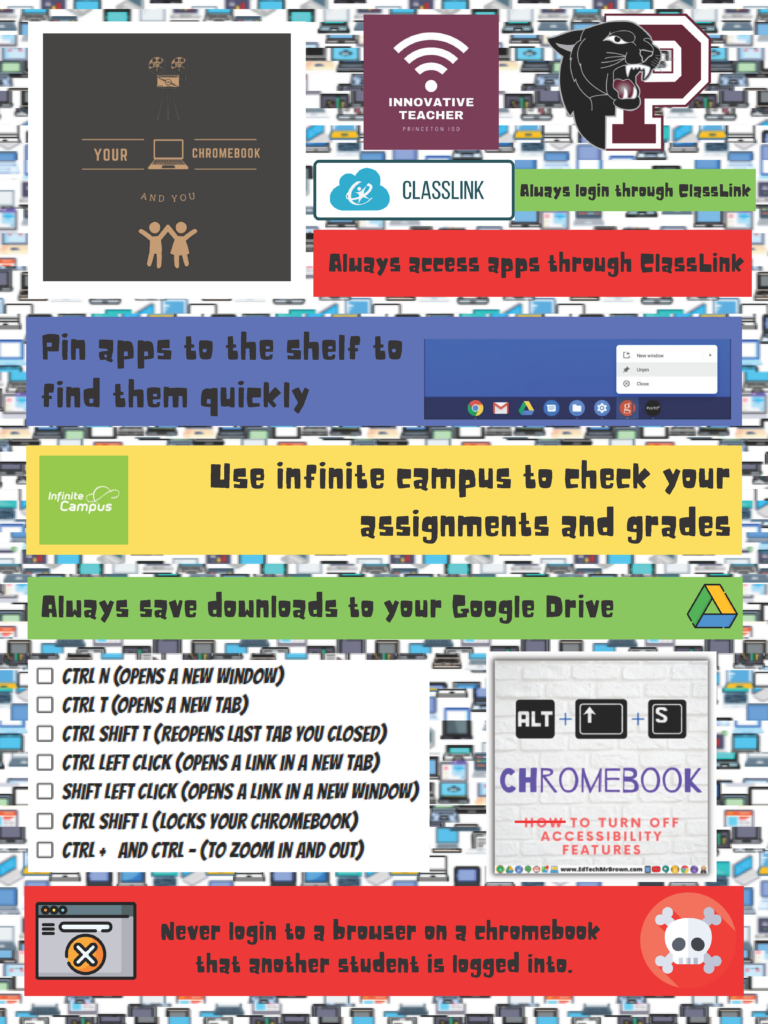
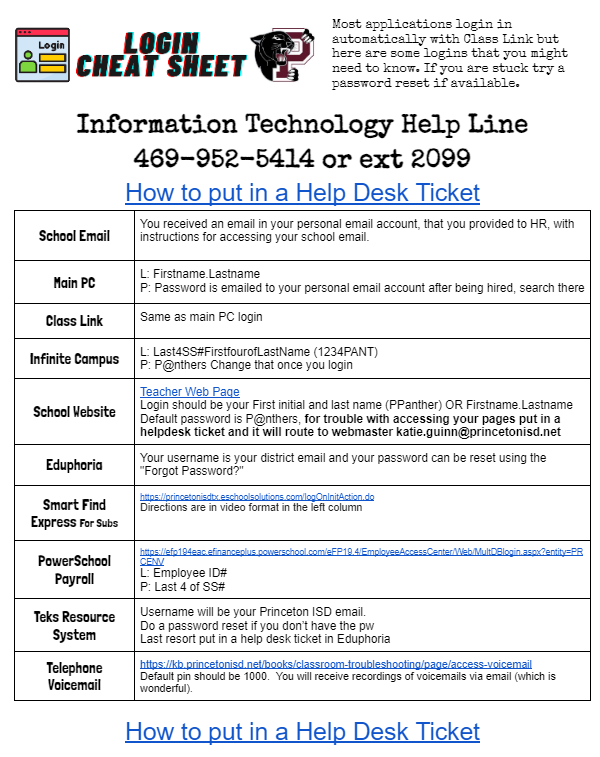
Here are some options for posters and slide shows of Chromebook tips and shortcuts that would be excellent for new users and even helpful for experienced students.
I learned a couple things myself looking these over.
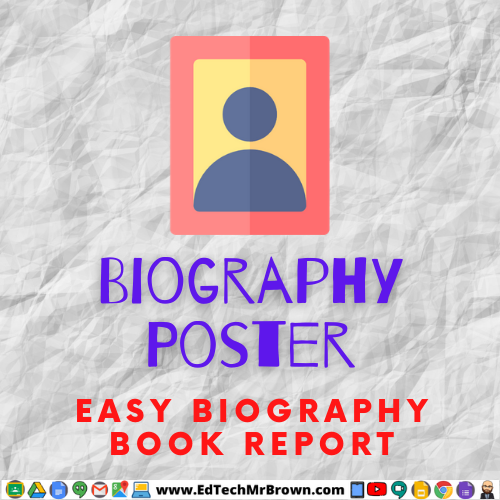
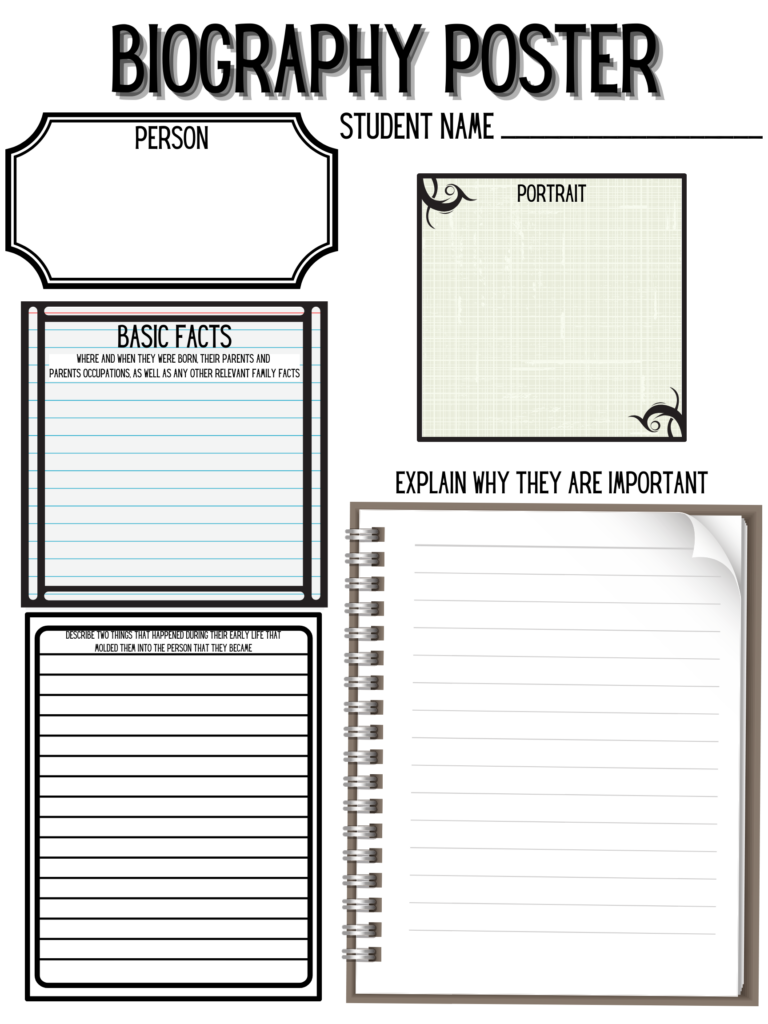
Here is an easy to complete one page biography book report. It is formatted big enough to even be printed on 11×17 paper to make it more exciting. It asks students to explain experiences from the persons early life that molded them as well as their significant impact on the world.
January 14, 2020|Alwayslearning, Beautify, EdTech, ELAR, Elementary, ELL, Google, Math, Organization, Review, Science, Secondary, Social Studies, SPED, Tools, Vocabulary

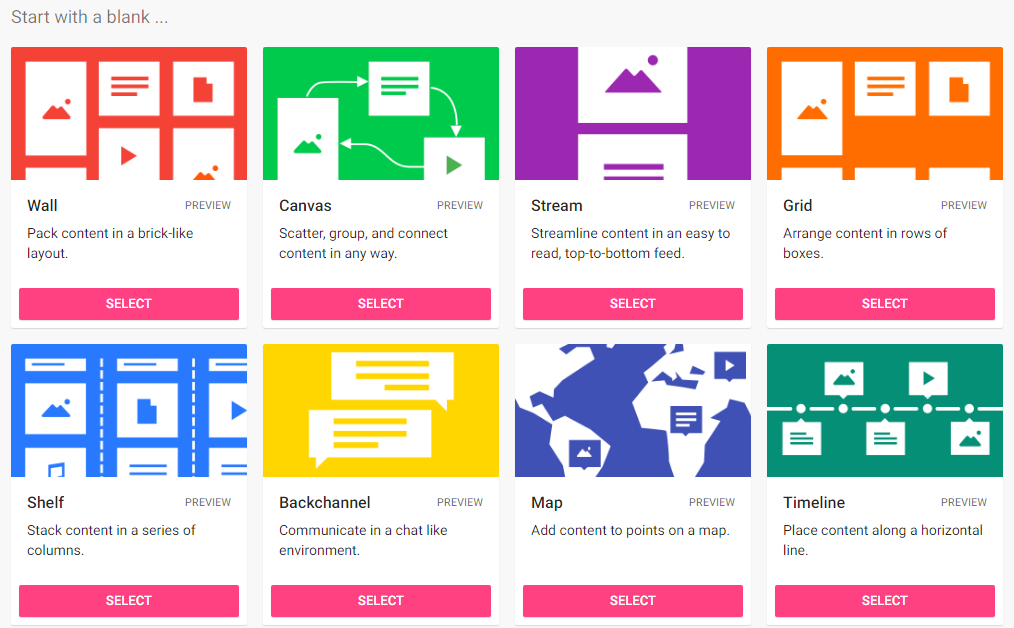
Padlet is a great tool for organizing digital student projects. You create a Padlet wall and students upload or post links to their projects like slideshows, docs, videos, etc.. You could also have students share resources they find as opposed to resources they created. You yourself could organize a padlet wall of resources that you want your students to explore.
There are different options for organizing your padlet wall’s information including a map and a timeline. There are lots of options for background colors and themes to design your wall. You can have 3 free Padlet walls which can keep you moving no problem if you just delete them when you are done with them.